Example Install:
- ls
bin
tw.dbin.SunOS5.2.0.0.exe
install.did
itools.1.4.0
mail.pw
test
(This is the contents of our example directory.)
- chmod +x tw.dbin.SunOS5.2.0.0.exe
- ls -l tw.dbin.SunOS5.2.0.0.exe
-rwxrwxr-x 1 bill users 9335667 Feb 7 11:58 tw.dbin.SunOS5.2.0.0.exe*
(You should see something similar to the line above.)
- ./tw.dbin.SunOS5.2.0.0.exe
Welcome the the iTools/TimberWolf Install program!
This is the self-extracting iTools installation and setup program. Because of security reasons, this program will *NOT* run under the root account.
Checking account...bill
Checking home directory.../home/itools
If you need to install binaries for more than one operating system,
you should exit this program, download the additional binaries (files
of the form: tw.[d]bin.
http://www.twolf.com/pub/releases/v1.
and the latest binaries may be found at
http://www.twolf.com/cgi-bin/beta.
If you are having problems extracting the programs, try the safe mode which unzips and untars the archive in two steps. To use the safe mode, use the '-safe' switch on the command line. The program will try to recommend when to use the '-safe' option.
iTools version 1.4.0 has already been installed.
Reply 'no' to resume the installation of iTools from previous point.
Do you wish to reinstall iTools in the current directory? (default no) (You should select no by hitting return here).
In order to execute iTools, the user must first set the iTools
environment variables ICDIR, ICOS, and LD_LIBRARY_PATH (SHLIB_PATH on
HP Unix). In addition, the user must set up appropriate links if
the Netscape plugin is to work correctly. ICDIR is the pathname of the
iTools root directory. ICOS is the name of the operating system. The
name of the operating system can be determined by executing the icuname
command in the ./itools.xxx/bin directory. LD_LIBRARY_PATH describes
the search path for dynamically linked libraries. All of these variables
and the Netscape plugin setup can be set to the appropriate values by
typing 'source .icrc
. ./.icrc .sh <CR>
or
. ./.icrc .ksh <CR>
respectively.
In the latest version of TimberWolf/itools, there are now non-hidden
files named setenv.sh and setenv.csh
for your convenience, that is the following also works:
source setenv.sh <CR>
or
source setenv.csh <CR>
Note: <CR> means carriage-return.
Do you wish to continue the installation and source the iTools initialization file? (default yes) (You should hit return here).
   Initializing the iTools environment variables...
   ICDIR has been set to /home/itools/itools.1.4.0
   ICOS has been set to SunOS5
   DISPLAY has been set to :0
   LD_LIBRARY_PATH has been set to:
     /home/itools/itools.1.4.0/lib/SunOS5:
   The search path now includes:

     /home/itools/itools.1.4.0/bin
   and
     /home/itools/itools.1.4.0/bin/SunOS5

   Netscape plugin enabled for SunOS5.
Do you wish to run the graphical interface instead of the non-graphical
command line interface? The default is to execute graphical interface.
To run the command line interface type no. (default yes) (You should hit return here unless you do not have a working X server.)
Entering Graphical Mode
Now the installation program should enter a graphical mode and you should see the following window on the screen.
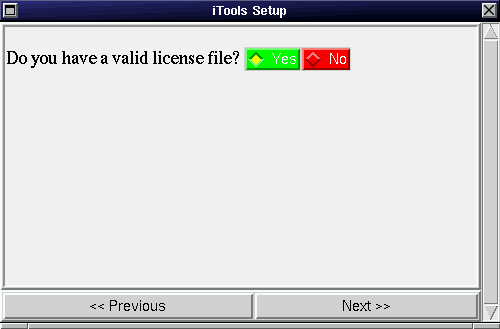
Click on the Yes button and then the Next button with the mouse cursor to continue the installation process.
You should now see the following window on the screen.
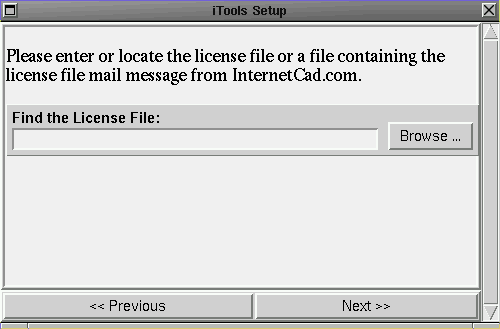
Click on the Browse button to find the location of your password file.
You should now see the following window on the screen.
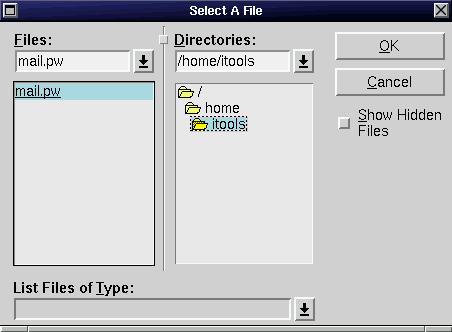
Locate the password file that was mailed to you using the directory tree. Then click OK.
You should now see the following window on the screen.
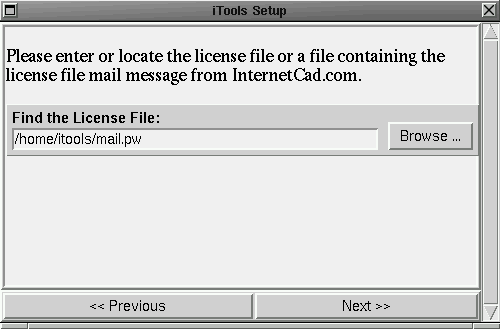
Click on the Next button to continue the installation process.
You should now see the following window on the screen.
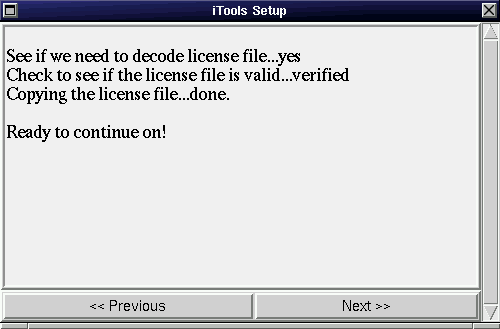
Click on the Next button to continue the installation process.
You should now see the following window on the screen.
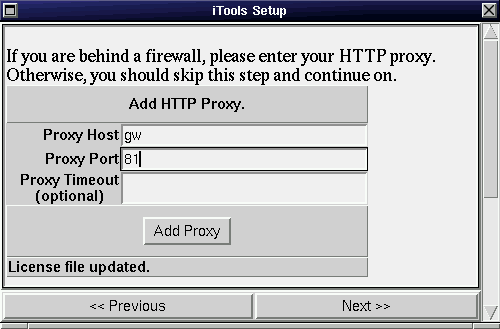
If you are behind a firewall, enter your HTTP proxy and click Add Proxy. Otherwise skip this step and click on the Next button to continue the installation process.
You should now see the following window on the screen.
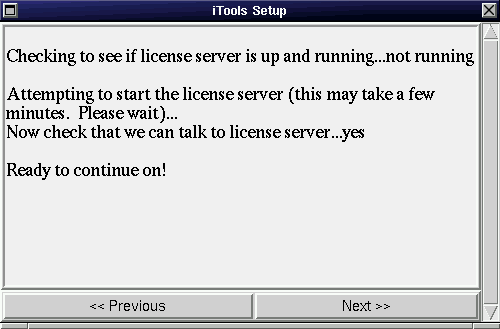
Wait for the license server to come up. It may take a few minutes. Then, click on the Next button to continue the installation process.
You should now see the following window on the screen.
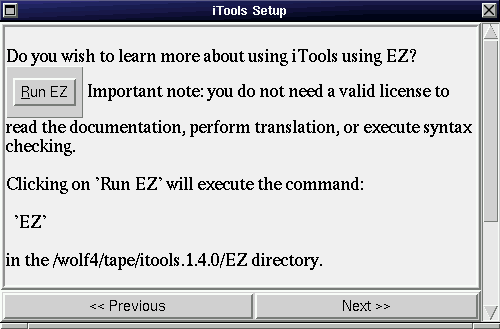
You can now run Itools through EZ. Just click on Run EZ to begin the program. If you do not wish to use EZ with Itools click on the Next button to continue the installation process.
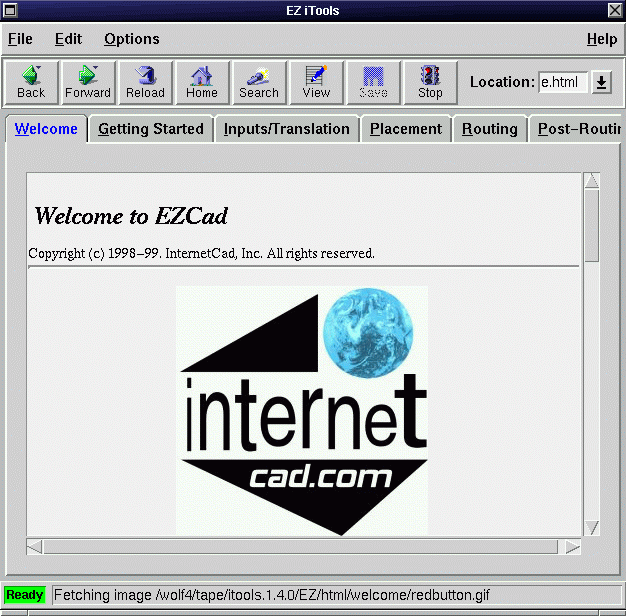
If you clicked on Run EZ you will now see the following window on your screen. You are ready to begin placing and routing your designs.
If you clicked on the Next button instead of Run EZ you should see the following window on your screen.
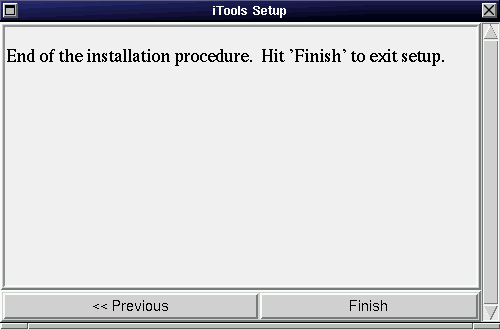
Click on the Finish button to exit the license install procedure.
Itools is now properly installed.
 Information
 Software
 Download
 Install